What is PSWindowsUpdate?
PSWindowsUpdate is an awesome PowerShell module that I have been using quite frequently to troubleshoot issues on devices without interupting the user behind them. Also I have used this to speed up the process of getting a new device, new VM, or recently imaged machine up-to-date. In this blog post, I will walk through installing the module, using it, and leveraging it different use cases.
PSWindowsUpdate is created and maintained by Michal Gajda and published on the PSGallery, making it extremely easy to install.
Installing the Module
You can install PSWindowsUpdate from the PSGallery by running the following commands in an elevated PowerShell instance.
Install-Module PSWindowsUpdate
Import-Module PSWindowsUpdate
Note
Make sure the account you are running PowerShell from is in the “Administrators” group on the device. You can also simply run the PowerShell instance as an administrator and enter credentials for an account that is an “Administrator”.View Available Cmdlets
After importing the module, the following cmdlets become available to you: Get-Command run against the module, then sorting by name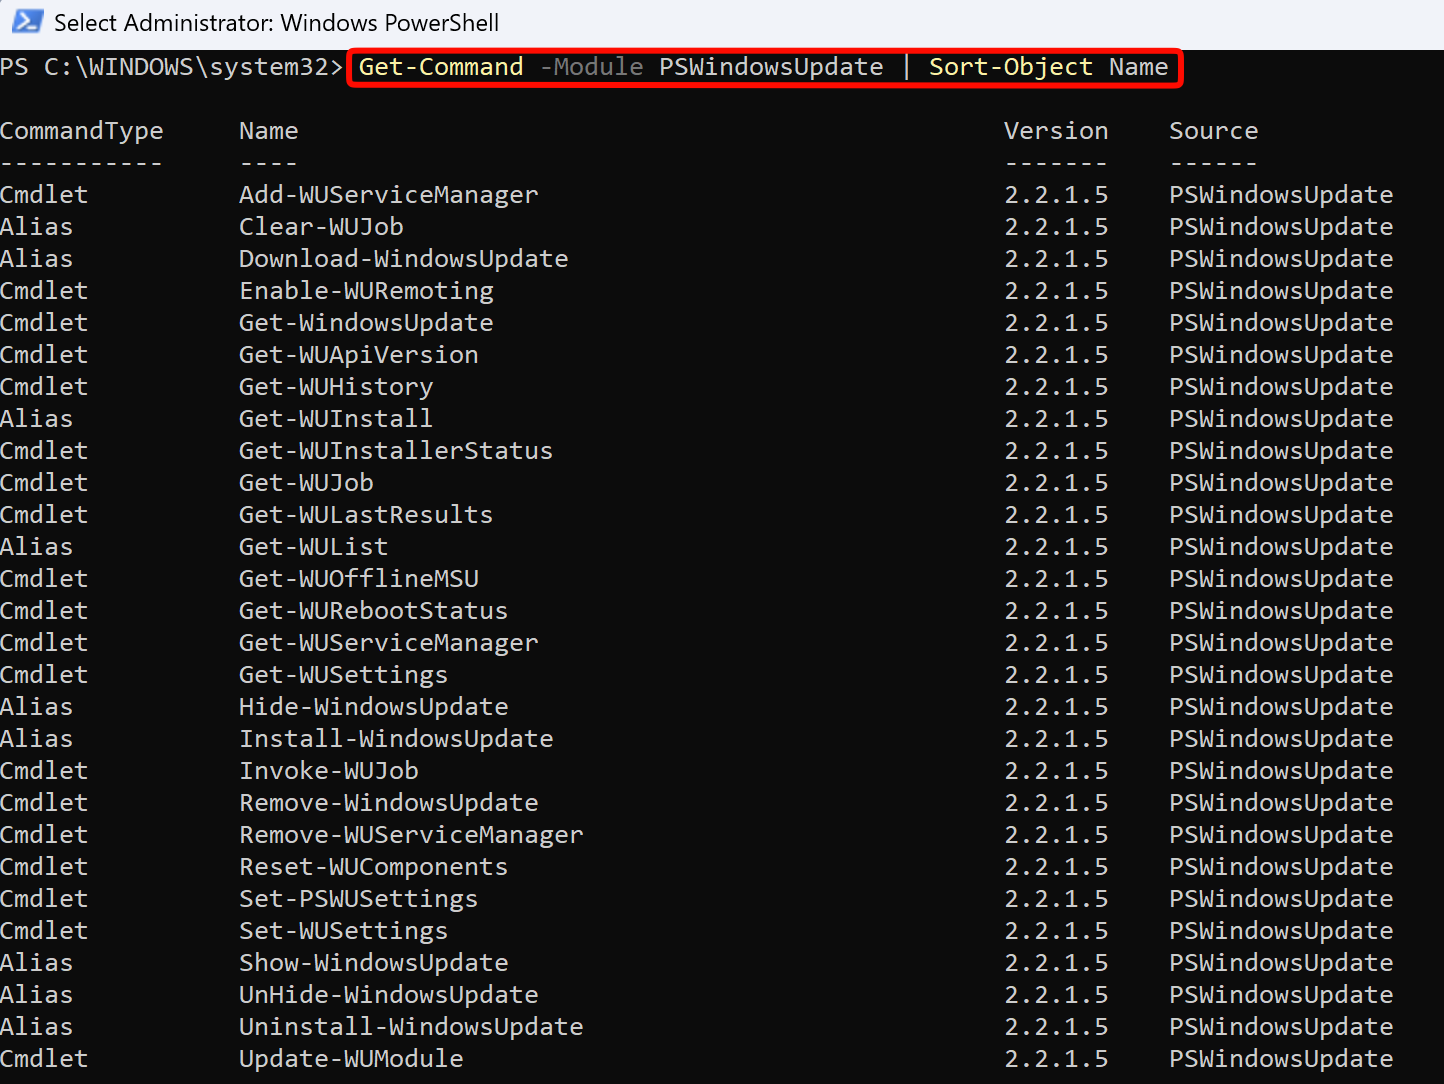
Basic Usage
Below, I will show some basic usage of the module and how you can leverage it to complete Windows Updates at a much quicker pace than the GUI allows. The examples shown below are all running on my Windows 11 Pro Parallels Desktop. I daily drive a Macbook Pro for personal use and employ Parallels to host Windows OS.
Checking for Available Updates
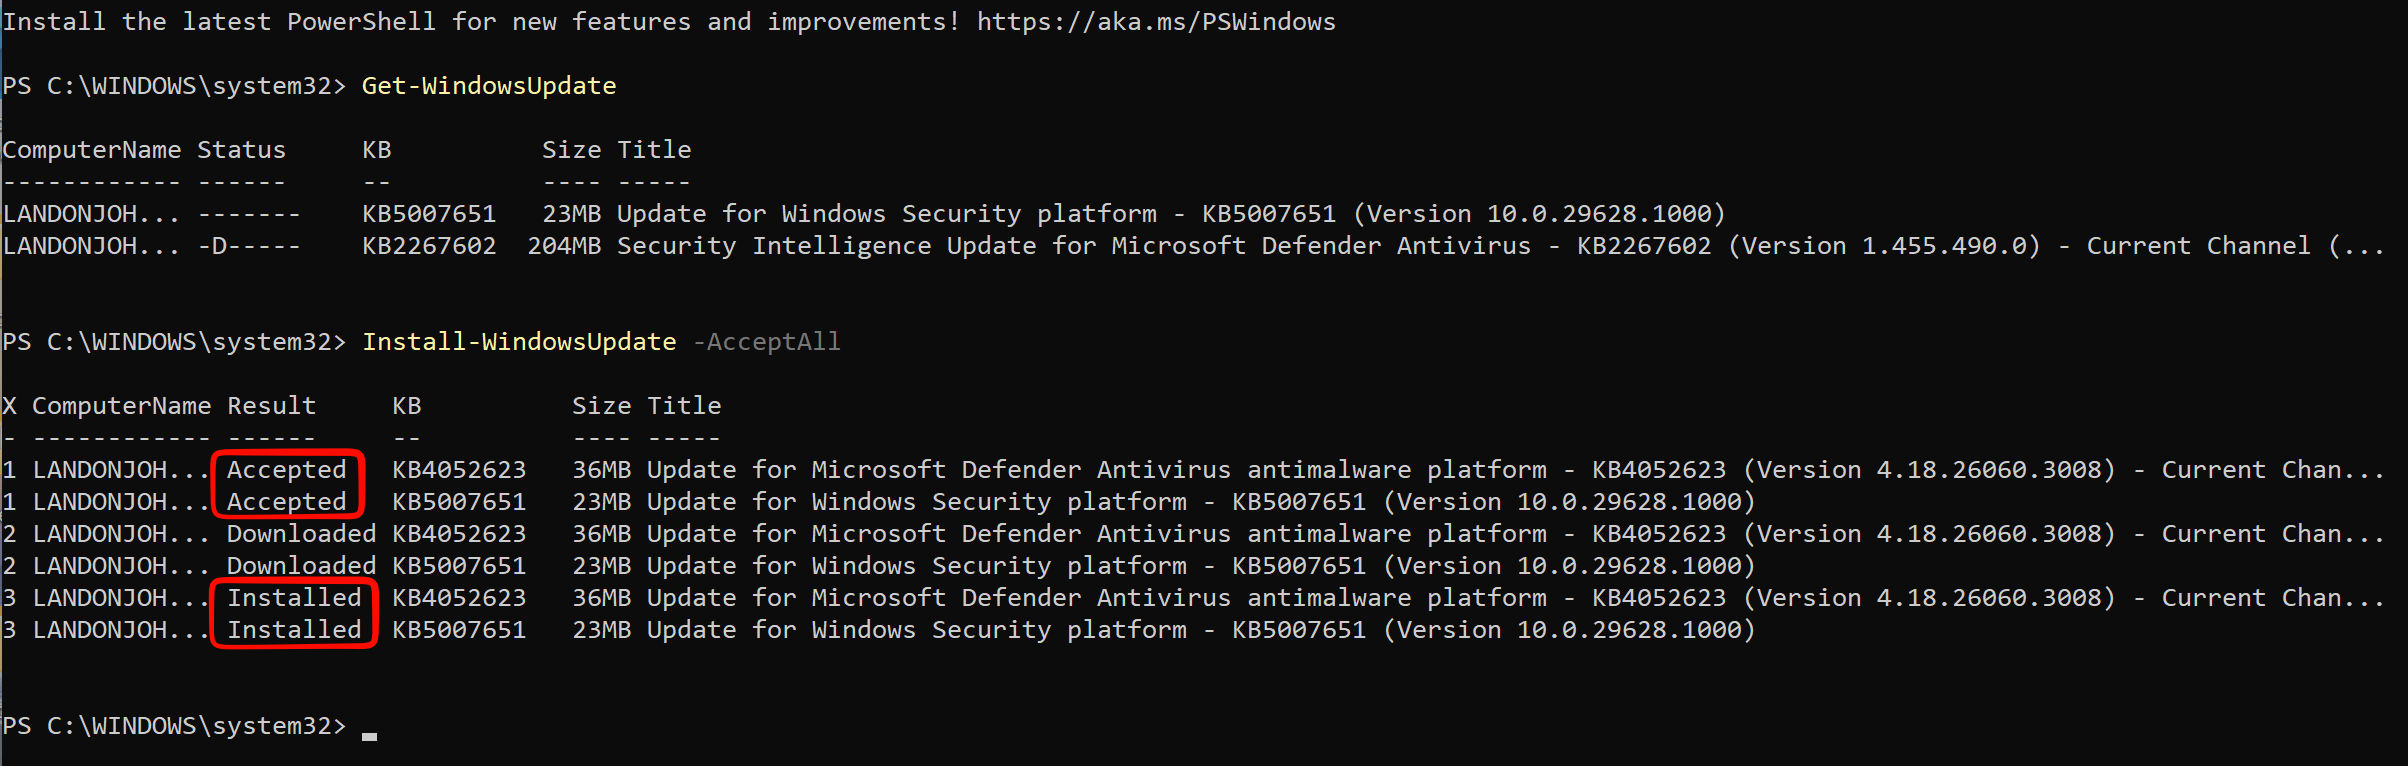
Running the Get-WindowsUpdate cmdlet will output which updates are available for the system.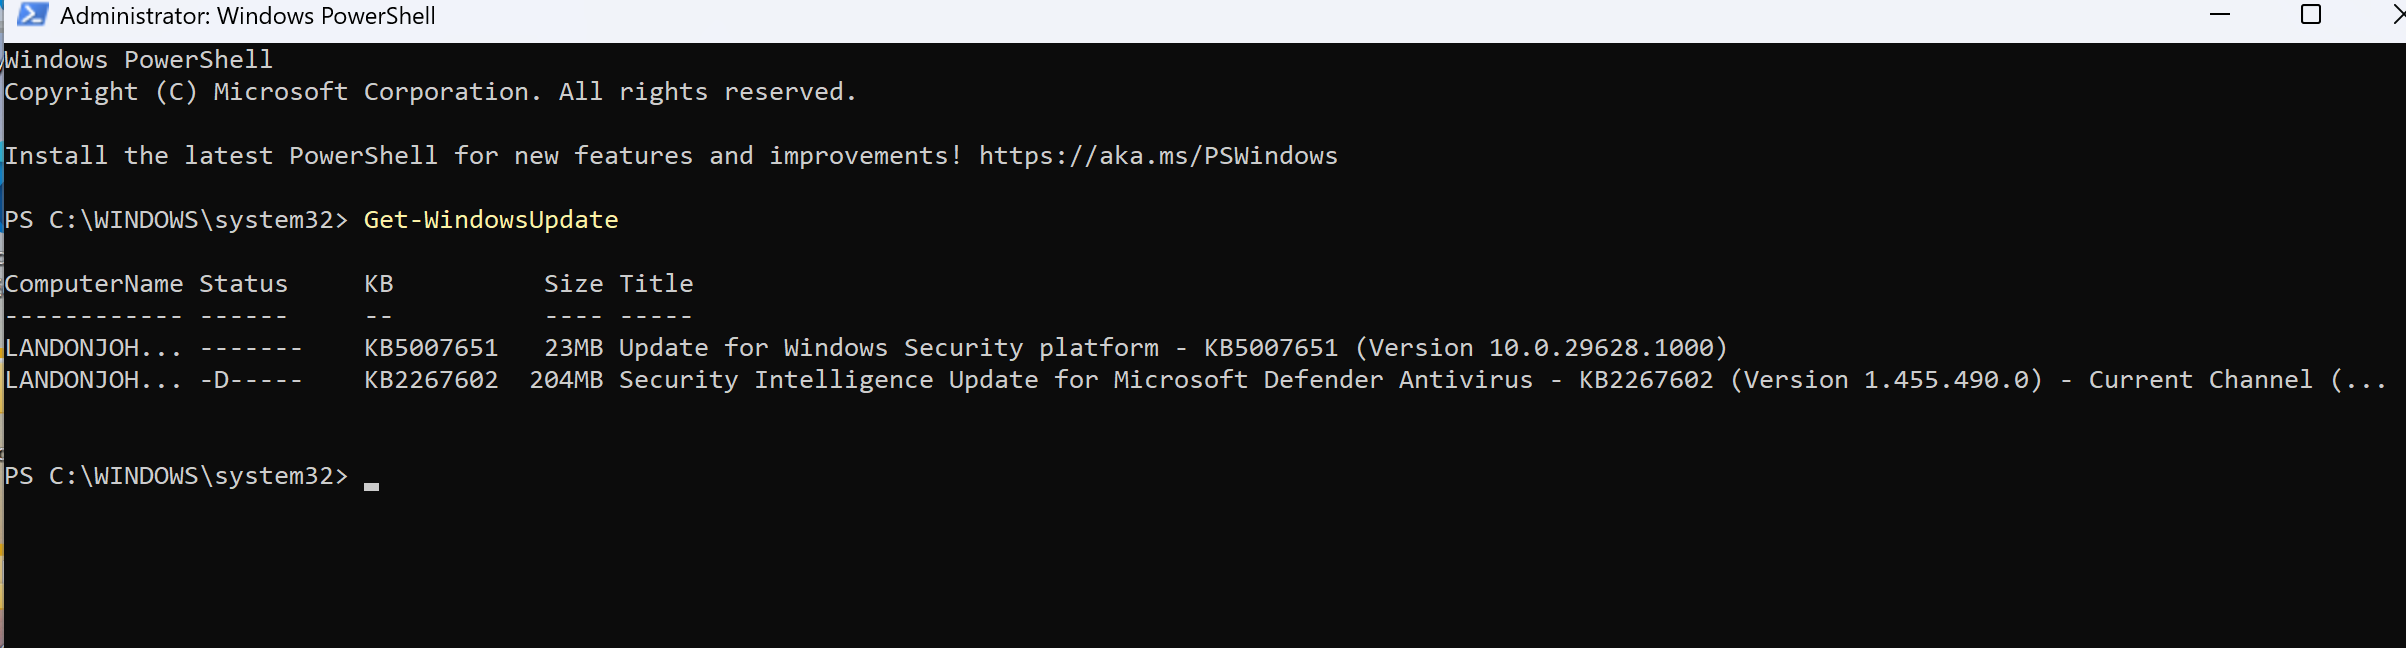
Note
Many of these cmdlets can be used against a remote computer by using the-ComputerName parameter.Installing Updates
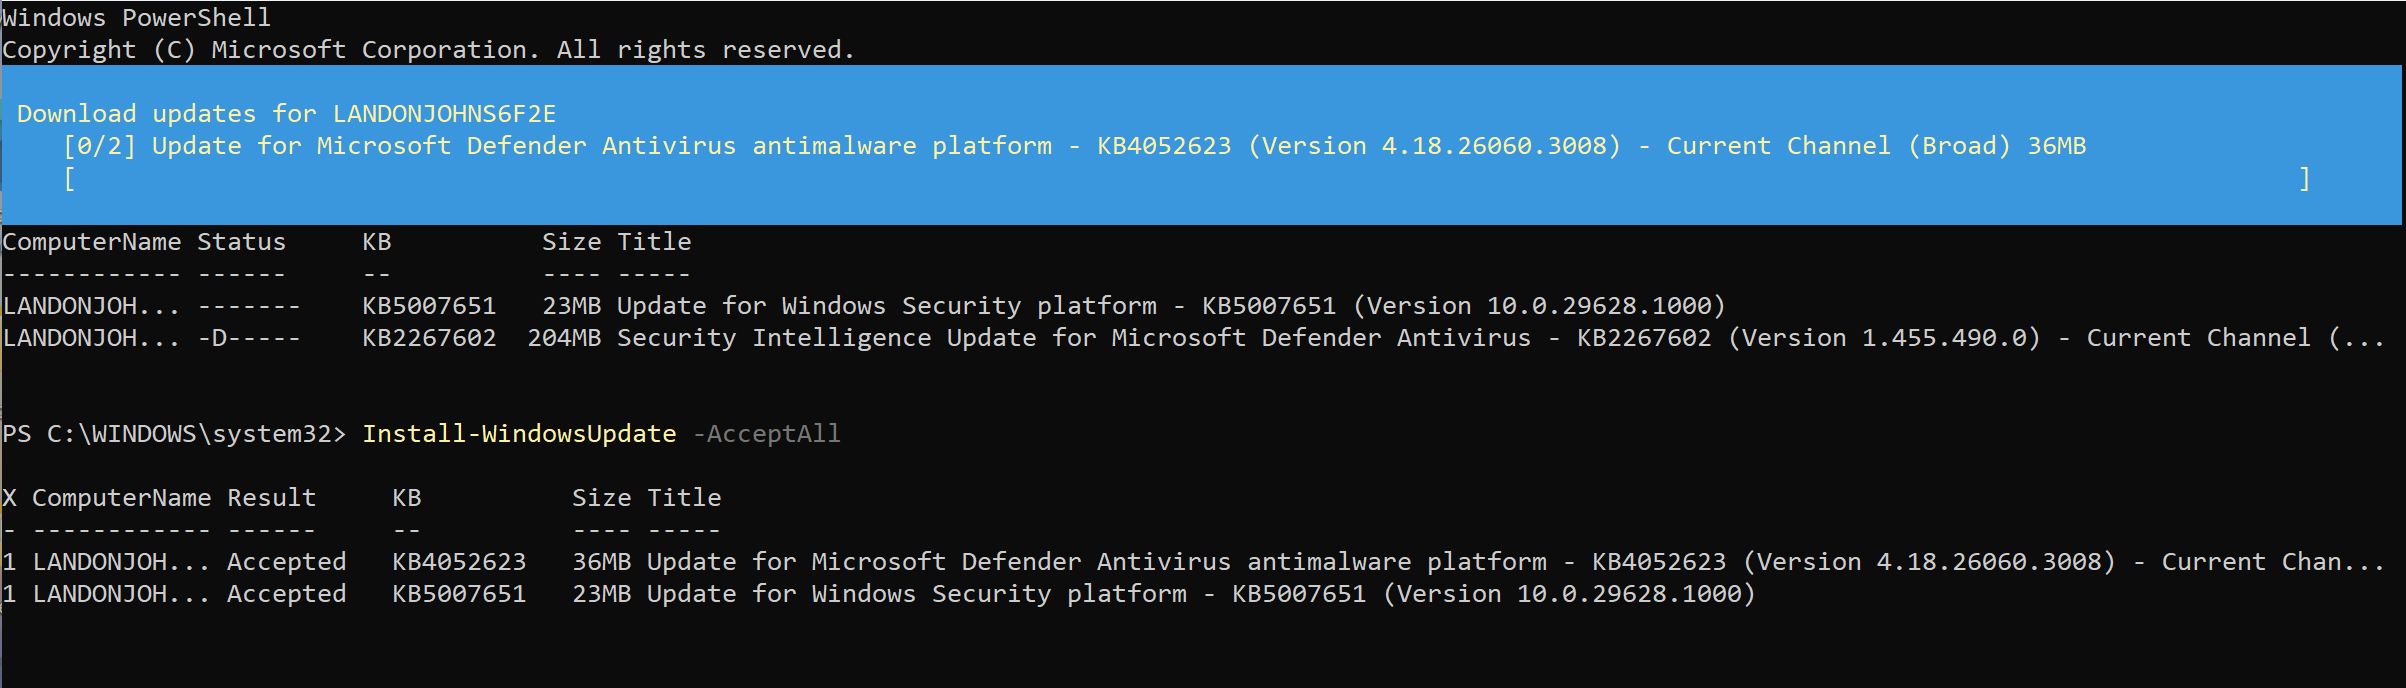
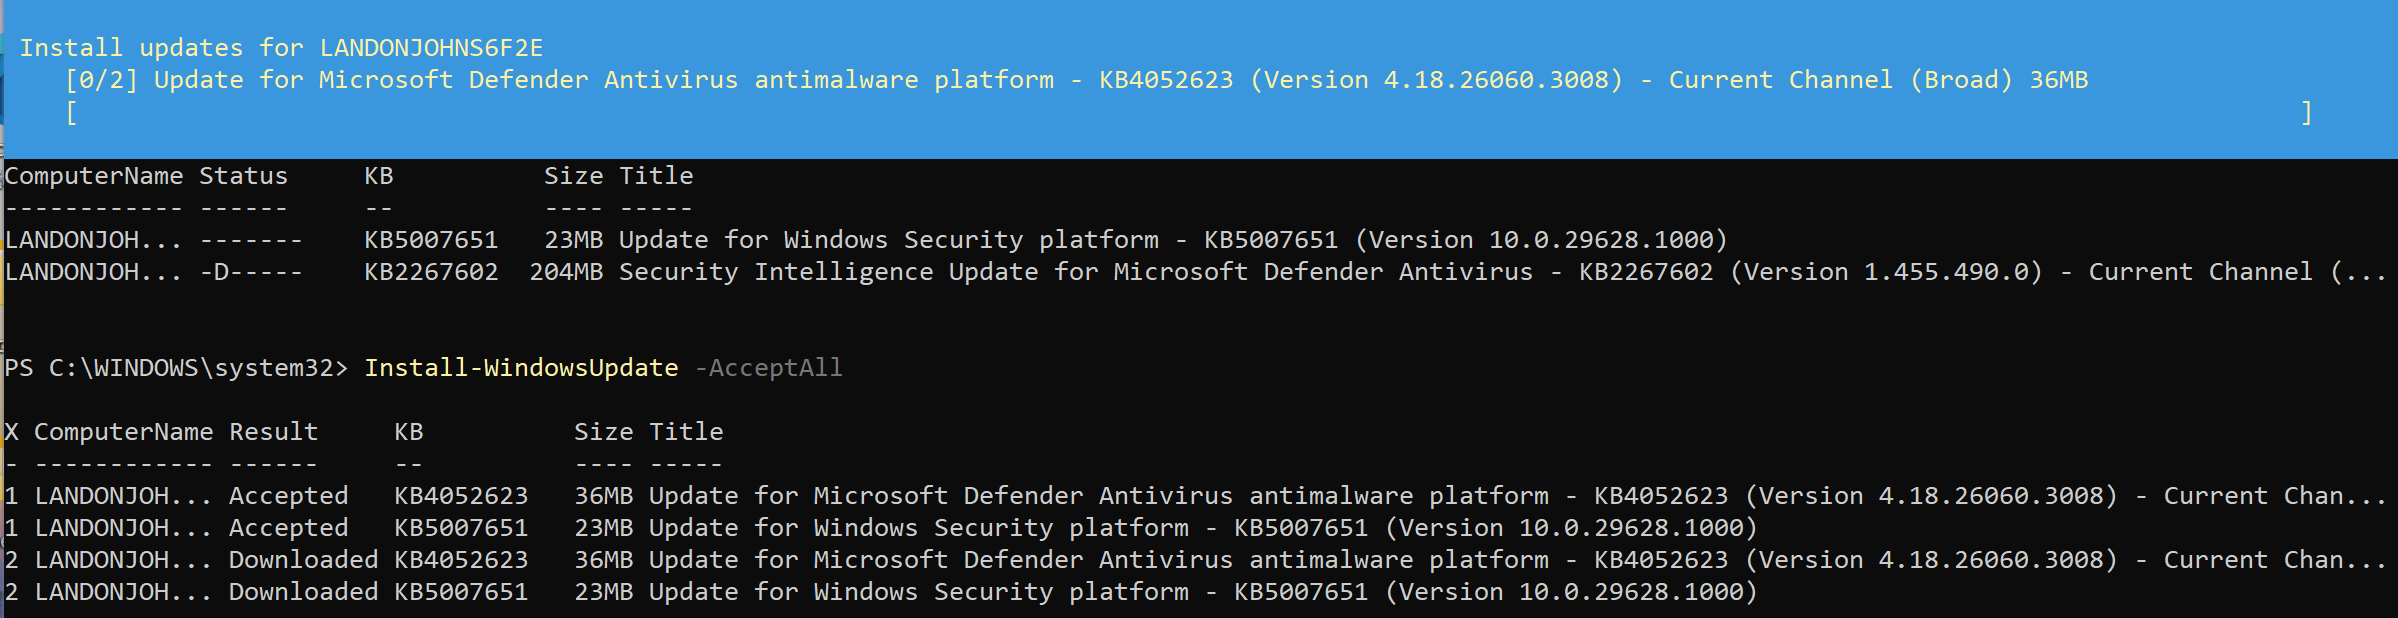
Running the Install-WindowsUpdate cmdlet will install any updates found and output progress during installation. I would suggest using the -AcceptAll parameter to avoid having to confirm each update manually.
Note
If any of the updates require a reboot of your device, you will be prompted. You can enterY for reboot now or press enter to accept the default of No. I highly suggest rebooting then and there if prompted.Check Update History
One of the great benefits of this module is the ability to view the history of all installed Windows Updates easily. This also allows you to easily target the uninstallation of a specific KB; we will get into that shortly.
Running the Get-WUHistory cmdlet will output all of the installed updates on the computer. You can use the -Last parameter to limit the number of results returned. To show you this, below you will see all of the installed updates on the computer.

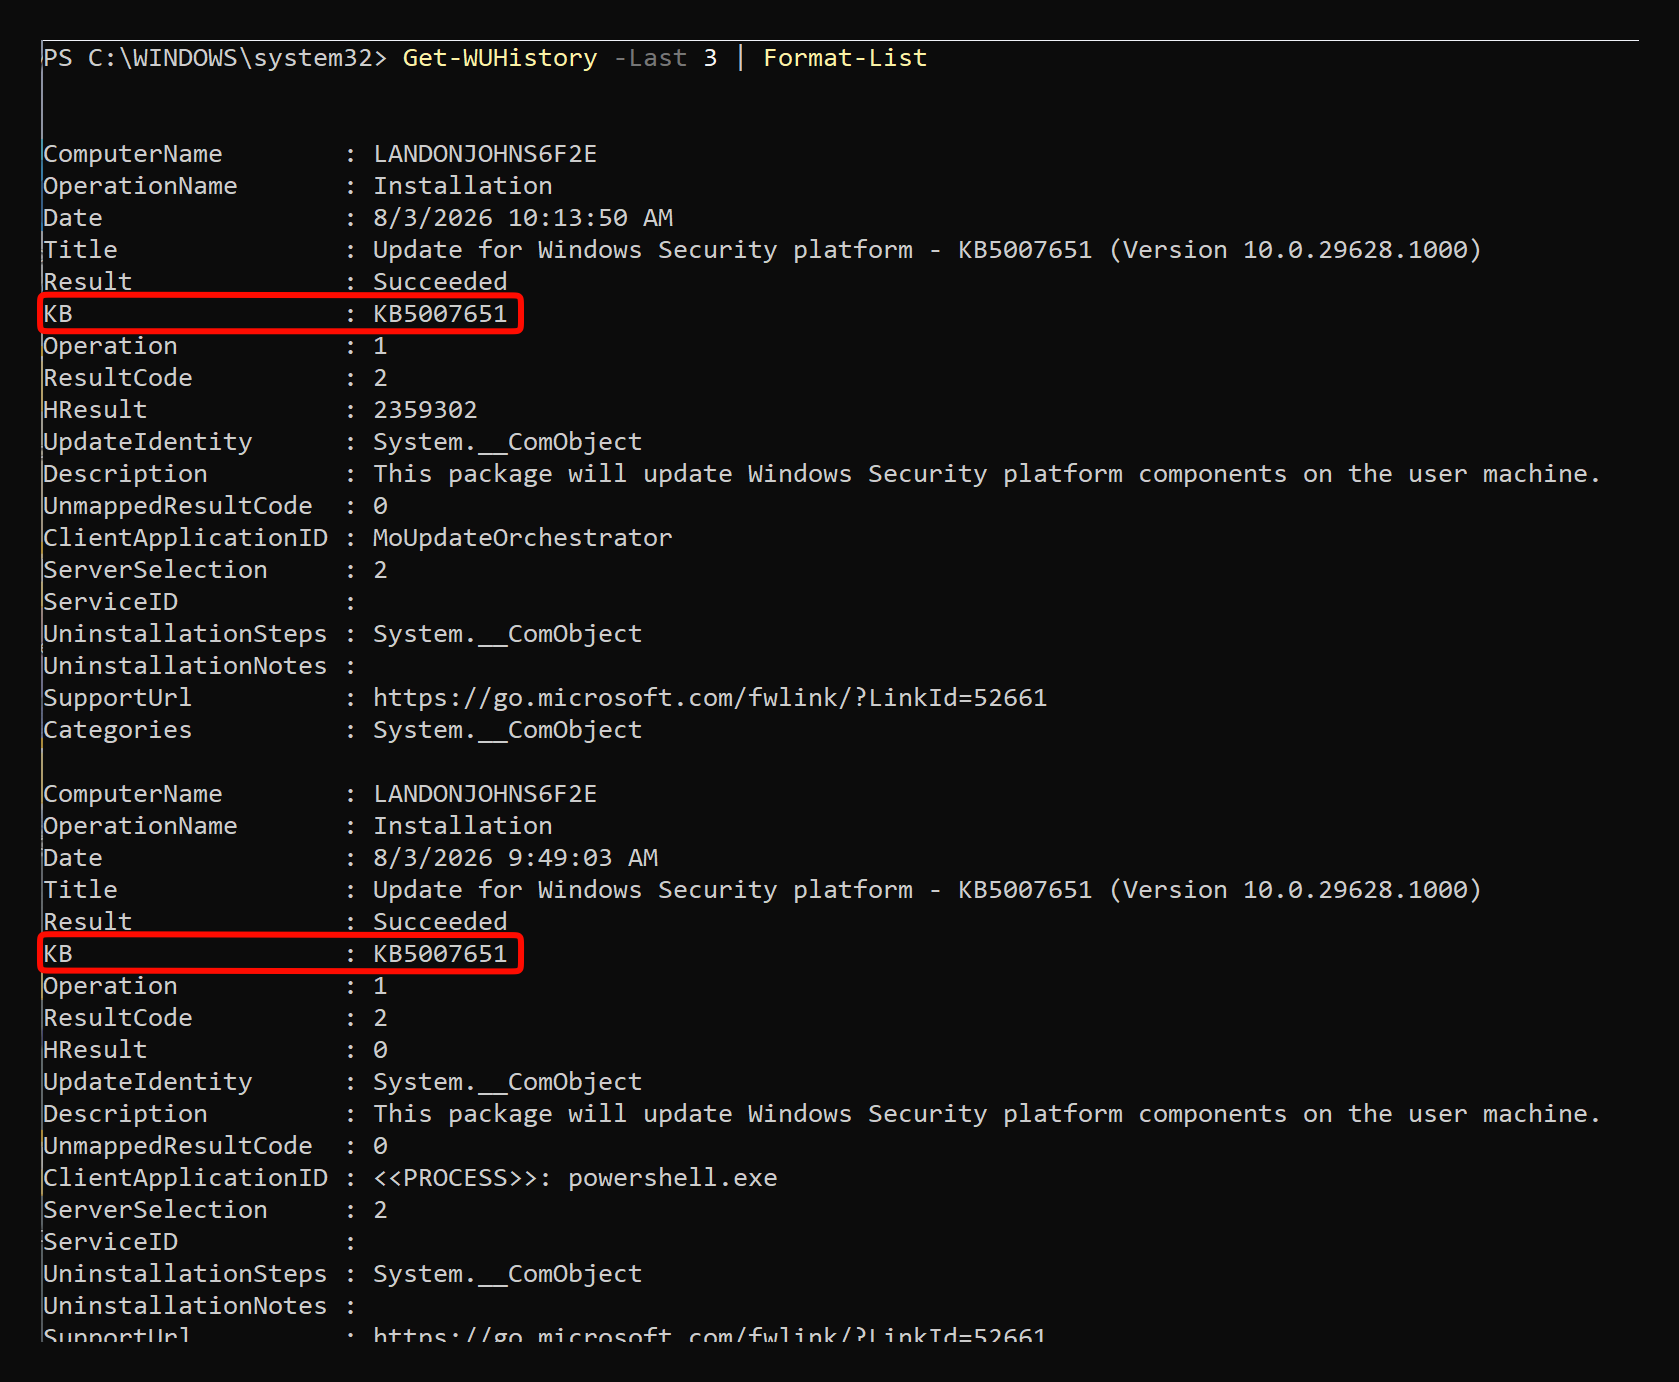
Now, as you’ll see, I attach the -Last parameter to the command, specifically -Last 3. This produces the last 3 updates installed on the computer.

To see even more information on the specific update details, (which can be very helpful for our next step) pipe the output into Format-List, like so.
Installing or Uninstalling Specific Updates
As seen in the last command we ran, we can easily find the specific KB Article ID. We can use those IDs to target the update associated with them and either install or uninstall.
Installing Specific Updates
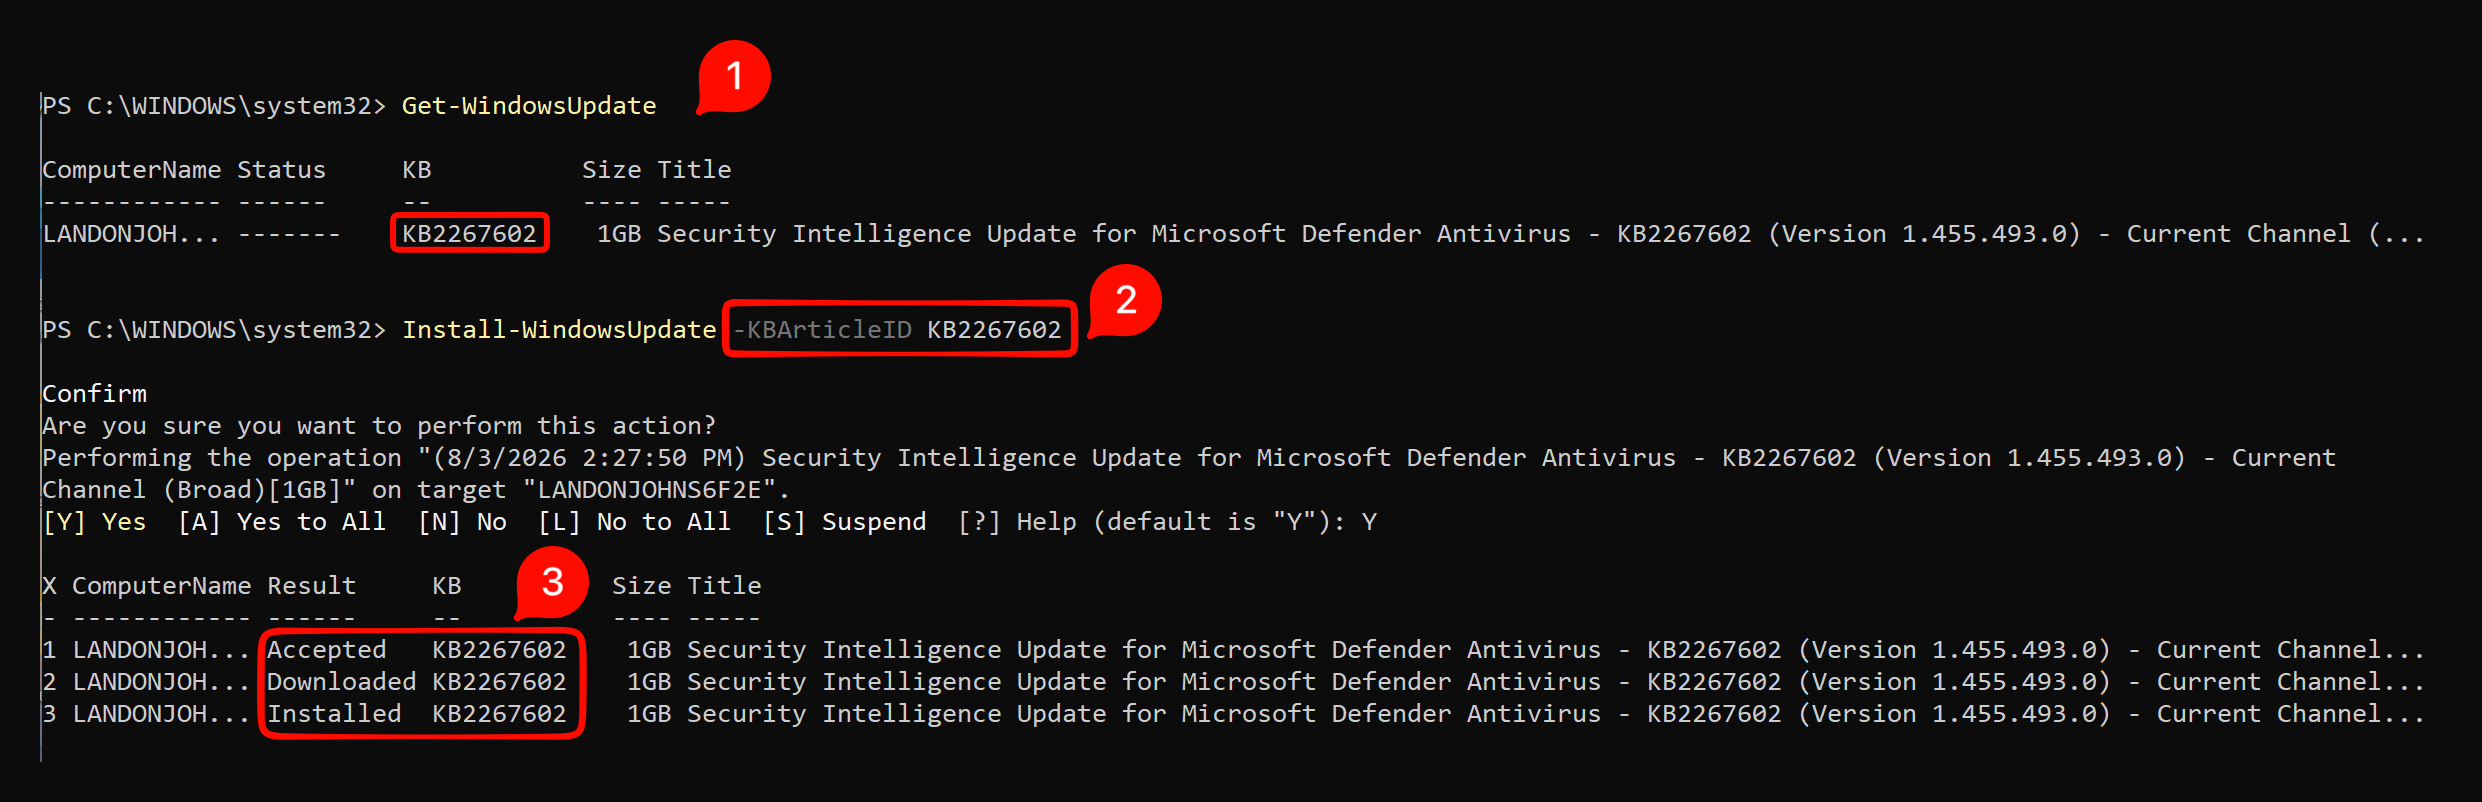
Run the Install-WindowsUpdate cmdlet with the -KBArticleID parameter, followed by the KB Article ID. Below you will see me run Get-WindowsUpdate to see what is available, then target that KB to install KB2267602.
Uninstalling Specific Updates
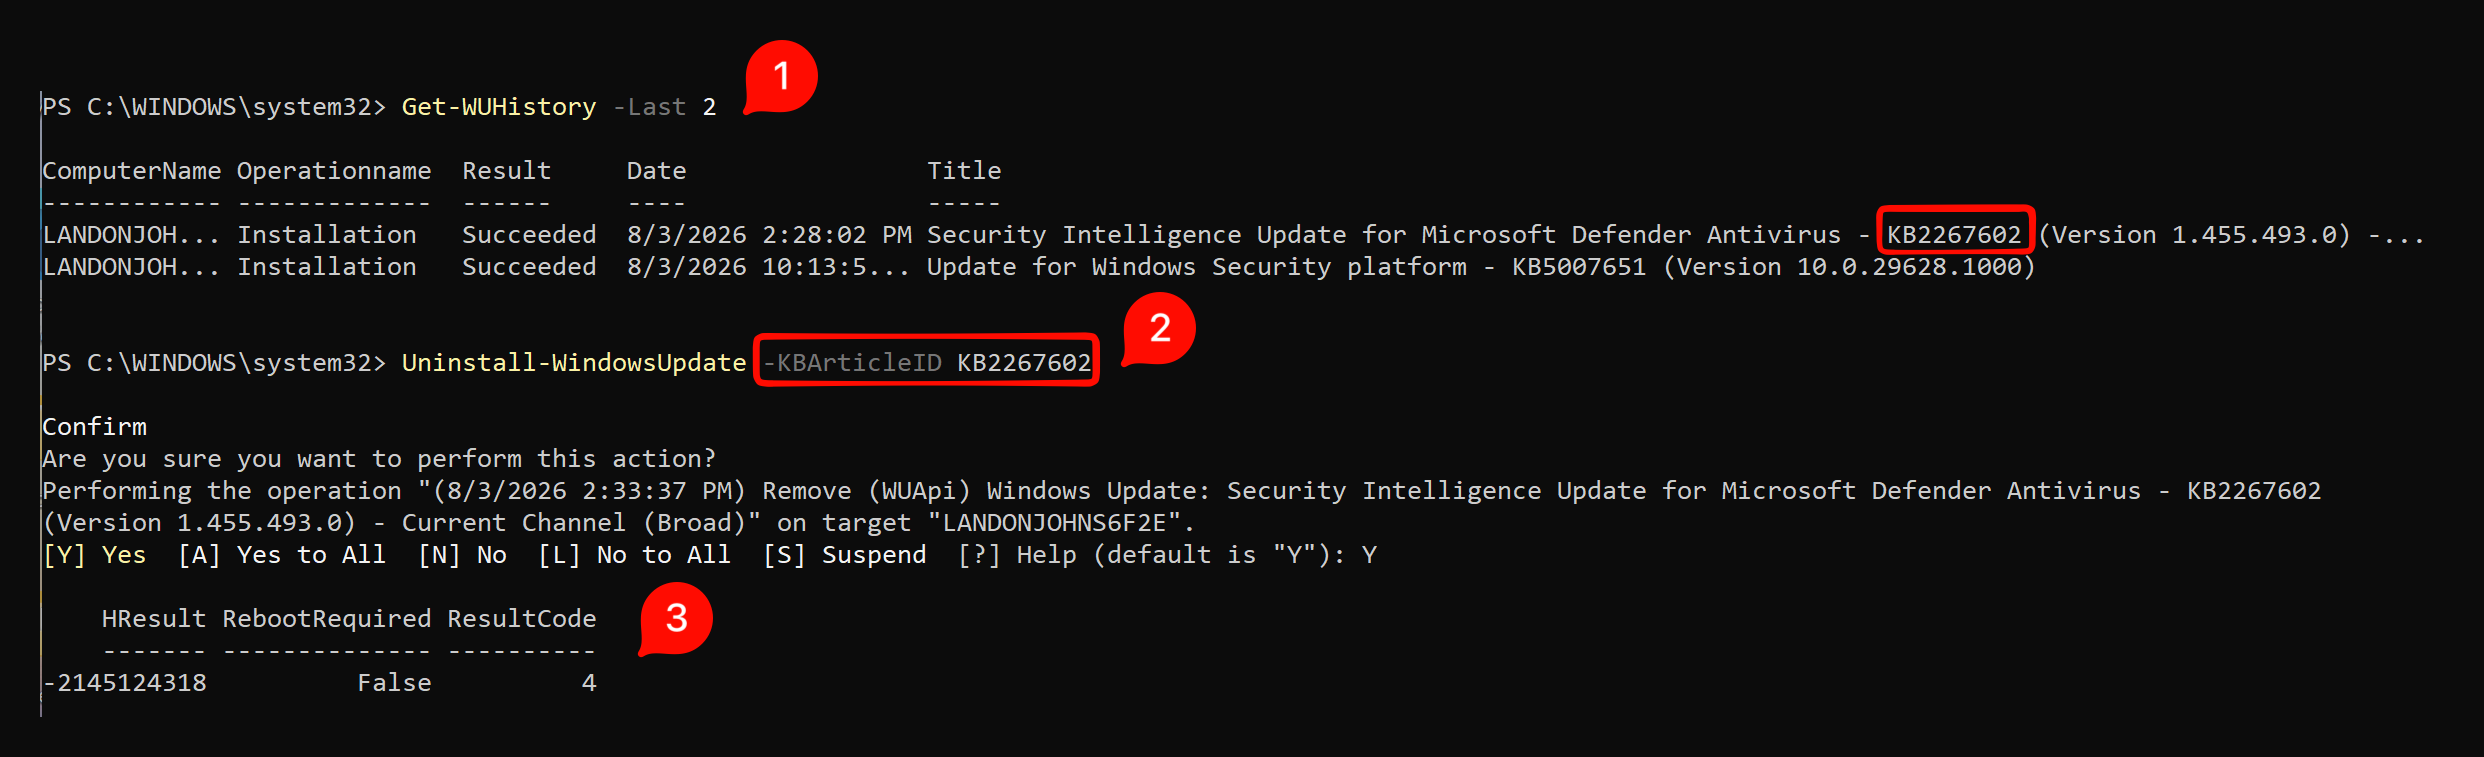
Run the Uninstall-WindowsUpdate cmdlet with the -KBArticleID parameter, followed by the KB Article ID. Below you will see me run the Get-WUHistory cmdlet to see what updates have been installed, then target that KB to uninstall KB2267602.
Warning
It is very common that this will fail (like mine above) due to many Windows Updates not being available for uninstallation. Especially as Microsoft has pushed more cumulative updates it has become more dangerous to uninstall them. Thus, Microsoft only offers uninstalls on specific KB’s. Still, it is worth a try if you believe a recent update has caused abnormalities or issues.Wrapping Up
One of the parameters I did not mention above that I use all of the time is the -IgnoreReboot parameter. I usually include this parameter alongside Install-WindowsUpdate -AcceptAll when troubleshooting a device in shich I do not want to interupt the user. The -IgnoreReboot parameter tells the module to NOT reboot the computer once the updates have finished installing. I then normally schedule the reboot later that night, once the user has left, or tell the user to reboot at their earliest convenience.
So, the full command I commonly use to troubleshoot computers with active users is:
Install-WindowsUpdate -AcceptAll -IgnoreReboot
Of course, the user’s computer must have the PSWindowsUpdate PowerShell Module installed, but again this is easily done remotely without disturbing them via Remote PowerShell or an RMM tool.
There you go! You now have the capabilities to use the PSWindowsUpdate module! There are so many ways this module can be used to your advantage, including scheduling updates via command line, installing/uninstalling specific KBs, mass updating remotely, the list goes on and on. This guide should give you the base understanding of the module to then get creative in your environment.
If you would like some more advanced details on the module here are some great resources: